Difference between revisions of "TrigGateway"
| Line 3: | Line 3: | ||
[[File:trigGatewayHome.png|600px]] | [[File:trigGatewayHome.png|600px]] | ||
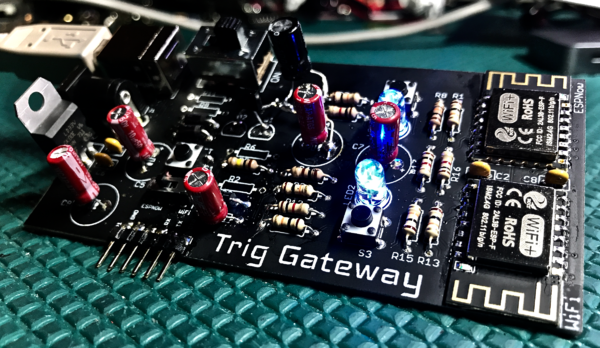
| − | + | This is the first version of a board called the "trigGateway" and this will take your trigBoard project to the next level! | |
| − | + | The purpose is simple - if you are using trigBoards to send push notifications, then you want those notifications FAST! That's where this board comes into play. Instead of the trigBoards all waking up connecting to the provisioned SSID and then sending directly to the service (pushbullet), NOW the trigBoards just wake up and immediately send a packet to the trigGateway, then it will take care of getting it off to the notification service (pushbullet). It does this with the help of two radios - one is listening for trigBoards, the other is always connected to the SSID ready to send off with the push notification. With this setup, trigBoards are only awake for ~1sec... then you get the notification really fast now. | |
| − | + | * Using ESPnow for point-point encrypted communication within ESP8266 modules, thanks to [https://github.com/HarringayMakerSpace/ESP-Now HarringayMakerSpace] | |
| − | |||
| − | |||
| − | |||
| − | |||
| − | |||
| − | |||
== Schematic == | == Schematic == | ||
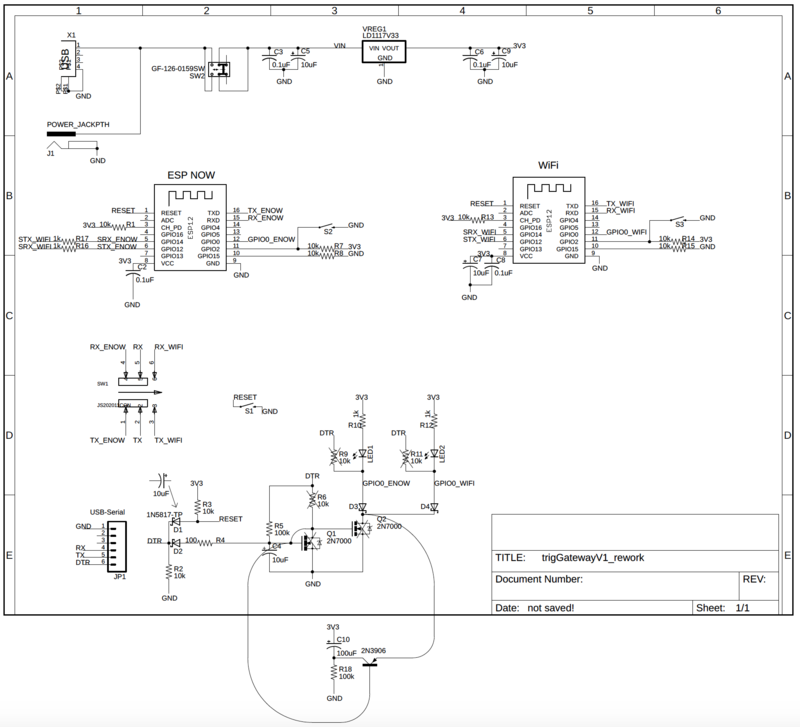
| − | + | Note that this was also an experimental board for an auto-reset circuit, so make sure you pay careful attention to the rework notes: | |
| − | |||
| − | |||
| − | |||
| − | |||
| − | |||
| − | |||
| − | + | [[File:trigGatewayReworkSCH.png|800px]] | |
| − | |||
| − | |||
| − | | | ||
| − | |||
| − | |||
Revision as of 22:36, 8 November 2018
...Back to Projects:
This is the first version of a board called the "trigGateway" and this will take your trigBoard project to the next level!
The purpose is simple - if you are using trigBoards to send push notifications, then you want those notifications FAST! That's where this board comes into play. Instead of the trigBoards all waking up connecting to the provisioned SSID and then sending directly to the service (pushbullet), NOW the trigBoards just wake up and immediately send a packet to the trigGateway, then it will take care of getting it off to the notification service (pushbullet). It does this with the help of two radios - one is listening for trigBoards, the other is always connected to the SSID ready to send off with the push notification. With this setup, trigBoards are only awake for ~1sec... then you get the notification really fast now.
- Using ESPnow for point-point encrypted communication within ESP8266 modules, thanks to HarringayMakerSpace
Schematic
Note that this was also an experimental board for an auto-reset circuit, so make sure you pay careful attention to the rework notes:

