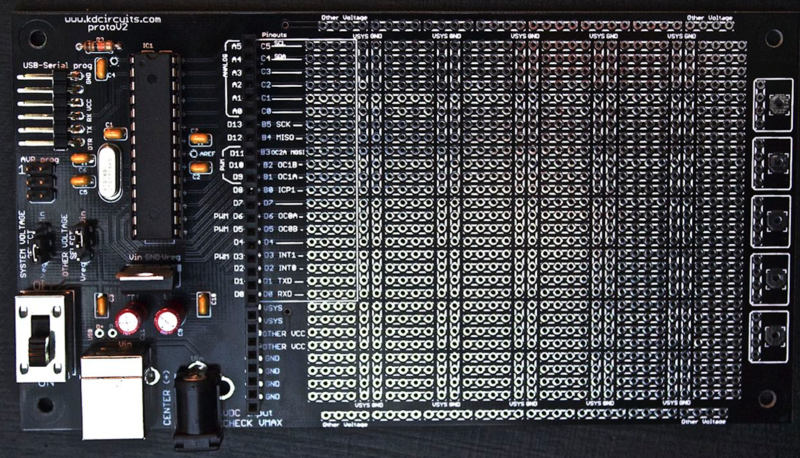
The Ultimate Prototyping Board:
Contents
Introduction
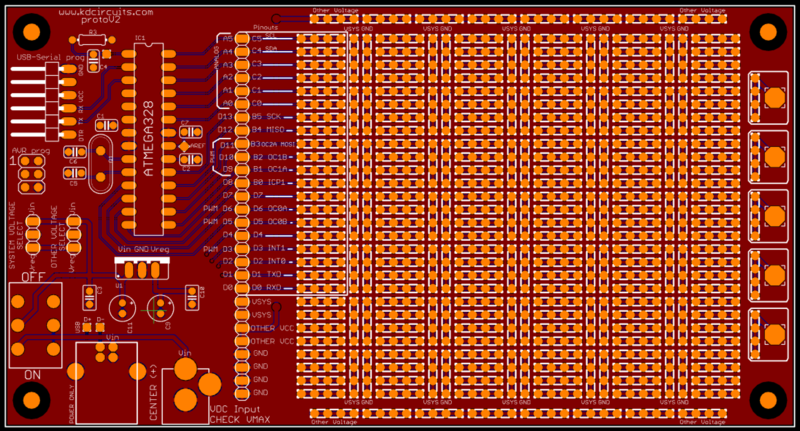
This is the second version of the Ultimate Prototype Board. Information about the first version can be found HERE
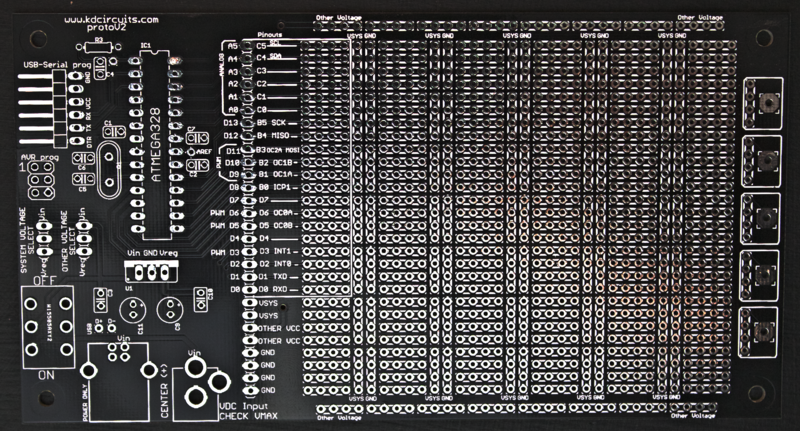
The Ultimate Prototype Board offers a slick solution to making your projects more permanent. Instead of clearing off your breadboard to make room for a new project, you can use this board to keep your projects forever! The board takes care of the Microcontroller and supporting circuitry for you as well as the programming headers, power entry, mounting holes, and clear labeling. Then you have the 'playground' section for your custom circuitry that you can solder directly to the board.
Features of the board:
- ATMEAG328 Microcontroller (28 pin Through Hole) support + Crystal/Caps
- AVR Programming Header
- Arduino Compatible Programming Header (USB-SERIAL)
- USB Power Input OR Barrel Jack Power
- Linear Voltage Regulator to Step voltage down for your projects
- Power Selection Jumpers - Choose where the microcontroller gets its power from Input Voltage or Regulated Voltage (see below)
- Power Switch
- x4 Mounting Holes (1/8")
- Board Dimensions 6"x3.2"
Purchase
How it Works
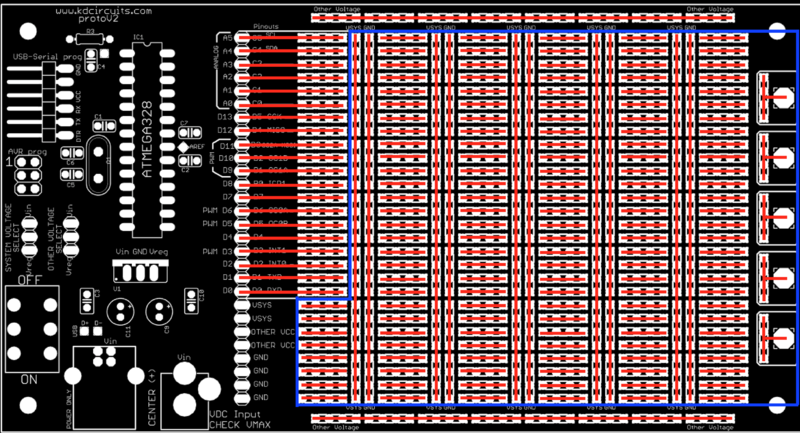
Proto Area
The area in blue here is the proto area for your custom circuitry.
The connections on the board are similar to how a bread board works. The red lines on the image above show how the through-holes are tied together. Silk screen on both sides of the board also make this clear. Vsys (System Voltage) and GND (Ground) rails run up and down the board for easy access. There is also an 'other voltage' rail that runs along the upper and lower sections of the board that can be used as an auxiliary voltage in the circuit.
Power
The board can be powered via the barrel jack input or through a standard USB type B connector. For the barrel jack connectors, see the parts list in the Assembly section below. The max input voltage depends on many factors, but mainly the max input voltage of the voltage regulator. The voltage regulator in the parts list is the LF33ABV, which has a max input voltage of 16V. This is a nice regulator because of it's low quiescent current draw (good for battery applications), but any regulator with this pinout will work IN-GND-OUT. This is also printed on the board for reference. Note that the board supports fixed output regulators only, but you could make a variable regulator work as well. You would have to place the regulator and feedback network out in the playground area and run wires back to the holes where the regulator would normally go. This also works if you need more space for a heat-sink or want to use a regulator with a different pinout.
The AVR programming header and USB-Serial Header connect directly to the System Voltage, so be careful not to apply voltage to these headers when the board is already powered externally.
Jumpers
The jumpers allow for easy control over the voltage rails. For example, if you powered the board via the USB connector, then you're Vin would be 5V. Now let's say you have some parts of your circuitry that require 3.3. So if you wanted to run the Microcontroller at the 5Vin, you set the System Voltage jumper to the Vin position. The Other Voltage jumper simply selects where the "Other voltage" rail is sourced from. In this case, the output of the voltage regulator (3.3V) or Vreg is selected.
Another example would be if you had a 12Vin to the barrel jack connector. Obviously you can't run the microcontroller at this voltage, so you'll definitely need the System Voltage jumper set to the Vreg (Regulator Output) position. Then if you were controlling 12V relays out in the proto area, then you'll need access to that 12Vin. You can set the Other Voltage jumper to the Vin position. Now the Other Voltage rail is set to 12V.
WARNING!!! Check these jumpers very carefully before powering up!
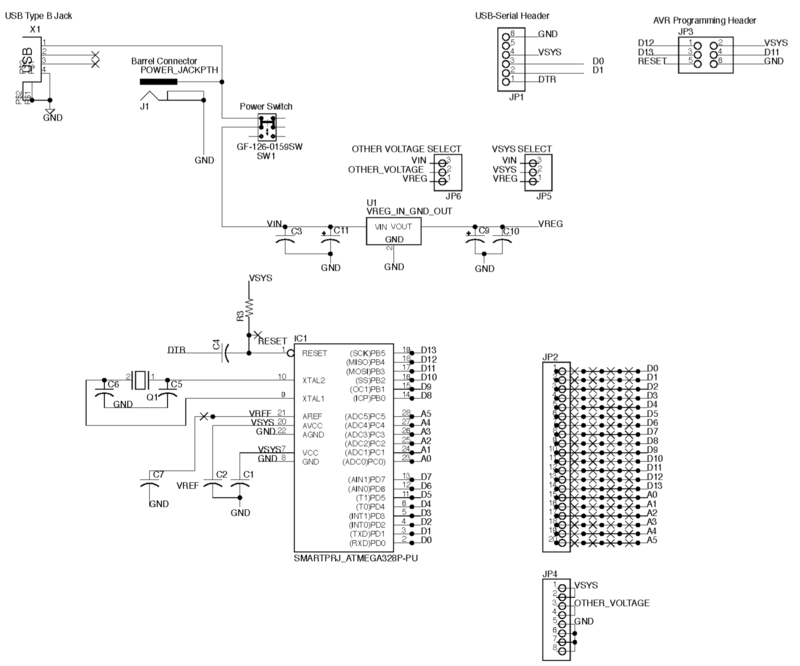
Schematic
For reference, here is the schematic:
Assembly
The board ships as a bare board (component kits may be available as well), but here is the complete list of COMPONENTS that you can order straight from Digikey. An 8MHz Crystal can be used as well. Search for: CTX900-ND
Testing & Programming
This video walks you through testing the board, initial bring-up, AVR programming (Arduino Compatible Bootloader), and programming the board from the Arduino IDE.
Tutorial on Burning the Arduino Compatible Bootloader:
